
It’s new semester in Australia. Some of us may back on-campus, but there are still some people, like myself, who still need to teach online. When chatting with lecturers and tutors, I find that many of us find online tutorials difficult to host. However, we are now living in an online world. Virtual classroom will be the trend of tertiary education. So, after a year of online teaching, I have gathered some tips of how to host an engaging tutorial online. Teaching can be interesting indeed.
1. Small group discussion
Many tutors find that they often stare at the computer screen like an idiot. Most students tend to turn off their cameras and microphones. They are the only person who speak during the entire tutorials. It then becomes a lecture.
To solve this problem, you must organise some small group discussions. Let students talk among themselves. I find breakout rooms work a lot in discussion-based tutorials. People often feel embarrassed of not turning their cameras on when there are only 4-5 people in a meeting. The awkward silence forces them to speak and contribute. It also helps you to talk less.
Even if you need to do some teaching, you will have to let student know each other for about 5 minutes. This is for them to build a network after class, so that they are not just come and go like lectures.
One disadvantage of breakout rooms in zoom is that facilitator needs to jump into different rooms to join the discussion. However, this is just normal if you are used to host face-to-face tutorials — you still need to shift into different discussions right?
Also, note that the duration of small group discussion should not exceed 15 – 20 minutes. Human cannot have long intensive conversation. In the end, a big group discussion is still essential.
2. Use of interactive tools
Students often lose concentration after listening to others 10-15 minutes straight. To make your online tutorial more fun, you must use some interactive tools.
Zoom provides functions such as shared screen or whiteboard. It helps to shift focus during the session, which I believe would be sufficient for most online tutorials.
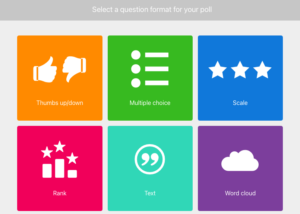
Another website that I use is Zeetings. It is a free virtual classroom website. It allows teachers to create its own slides, polls and surveys. Students can simply enter the link and vote/type instantly during the class. No login is required. It is an easy, interactive tool for e-learning.
3. You are the facilitator
Another issue that tutors often face is that there is either an awkward silence or the discussion is out of control. But remember, you are the facilitator. You can, and must, set some house rules for your online tutorials. For me, I usually ask my students to turn on their cams and speak instead of just type. This is the most direct way for interaction and encourage students to speak out. I also find the hands up function from Zoom very useful, which helps the discussion flows.
4. Before and after follow up
Finally, you are not only a tutor during the tutorial. People feel engaged because they feel that they have a bonding with you. Sending reminder and follow up email before and after the tutorial show that you care your students as a person. You are not treating tutoring as a job. The emails can be simple, such as remind them to go to online tutorials every week, recap the major content this week, or even ask them to take a break from studying. These messages won’t take you too long to write up, but they help you to interact with you students.
I hope all these tips help you how to host your online tutorials. Happy teaching!
One thought on “4 tips to host online tutorials”